> For the complete documentation index, see [llms.txt](https://berkeley-humanoid-lite.gitbook.io/docs/llms.txt). Markdown versions of documentation pages are available by appending `.md` to page URLs; this page is available as [Markdown](https://berkeley-humanoid-lite.gitbook.io/docs/getting-started-with-hardware/3d-printing-instructions.md).
# 3D Printing Instructions
## Files
Please refer to the Releases page for the latest release of CAD model and 3D printing project files.
{% content-ref url="/pages/ReTulzQ4ECBUQPnquXTq" %}
[Releases](/docs/releases.md)
{% endcontent-ref %}
## Print settings
The following parameters are tuned for the Bambu Lab X1C 3D Printer. Additional modifications might be required to fit your own printer's characteristics.
## Printing the actuator
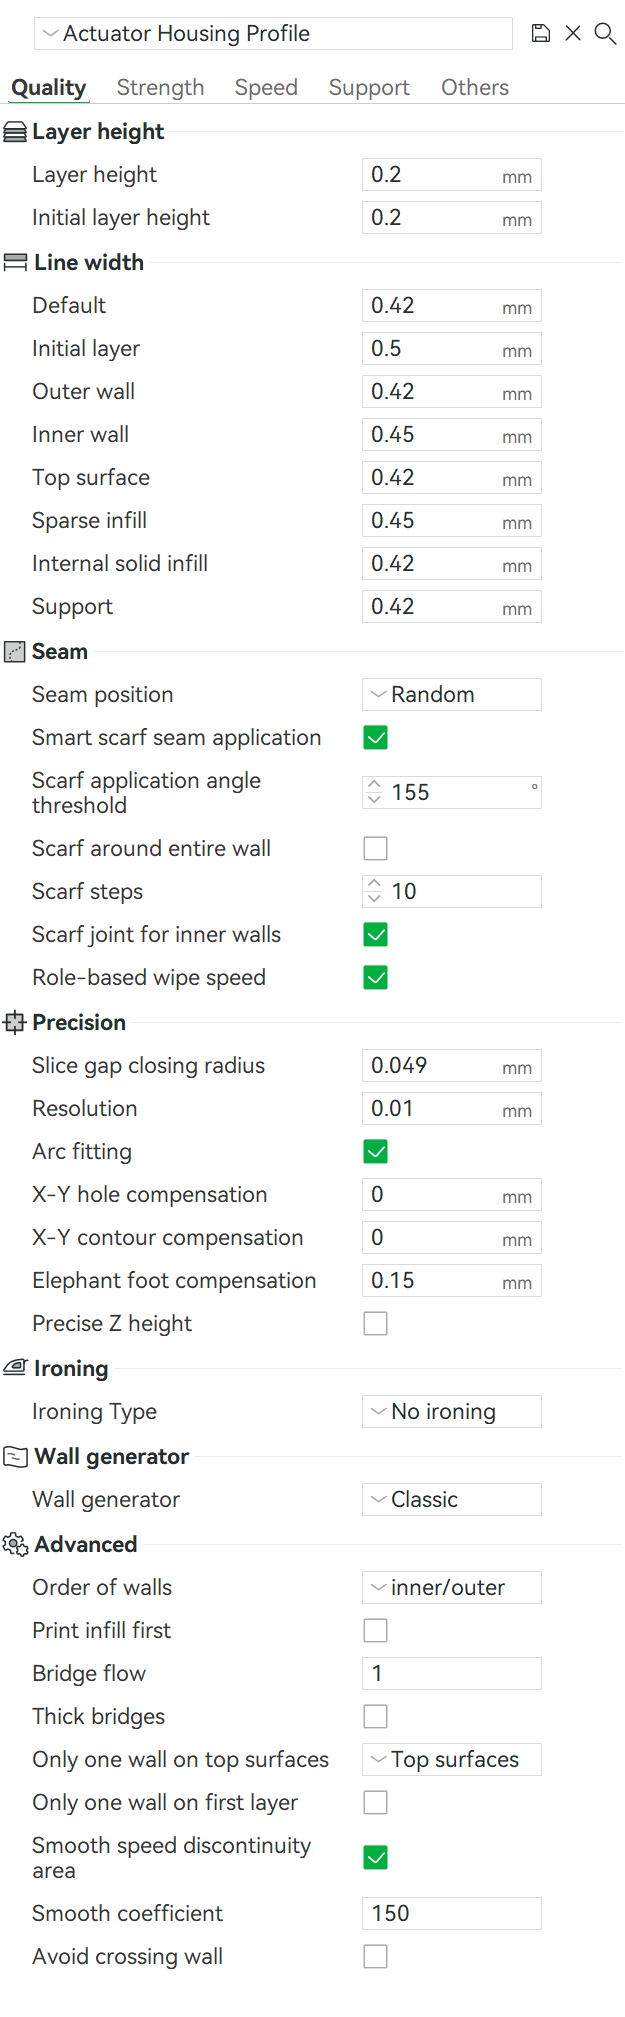
### Actuator Housing Profile
For the housing, output shaft, and the motor shell, the Actuator Housing Profile should be used.
{% tabs %}
{% tab title="Quality" %}
{% endtab %}
{% tab title="Strength" %}
{% endtab %}
{% tab title="Speed" %}
{% endtab %}
{% tab title="Support" %}
{% endtab %}
{% tab title="Others" %}
{% endtab %}
{% endtabs %}
### Actuator Shaft Profile
For the cycloidal disk, input shaft, motor shaft, and the spacers, the Actuator Shaft Profile should be used.
{% tabs %}
{% tab title="Quality" %}
{% endtab %}
{% tab title="Strength" %}
{% endtab %}
{% tab title="Speed" %}
{% endtab %}
{% tab title="Support" %}
{% endtab %}
{% tab title="Others" %}
{% endtab %}
{% endtabs %}
## Printing the rest of the robot
Similar principle applies to the rest of the robot.
Parts on the Upper Body and Lower Body plates need to be printed twice in mirrored setting to assemble the two arms and two legs. This can be achieved by right-clicking the part and selet "mirror along X axis".
The structural parts does not require the high precision as the actuator modules, so they can be printed at a faster speed setting.